Collision Detection
When moving models, links may interfere (collide) with other links. Choreonoid is equipped with a function to detect such interference, and this section explains how to use it.
Collision Detection and World Item
To perform collision detection, you first need to introduce a “World Item” type item.
A World Item is an item that represents a virtual world in Choreonoid. With this item, you can:
Associate body models with a virtual world
Configure settings for the entire virtual world
Handle multiple virtual worlds simultaneously
For collision detection, the following settings are also required:
Which objects to detect collisions between
How to display collision detection results
Since it is logical to associate these settings with a specific virtual world, collision detection settings are also configured through the World Item.
Creating a World Item
A World Item can be created using the standard item creation method. Specifically, execute “File” - “New” - “World” from the main menu, and press the “Create” button in the “Create New World” dialog that appears.
Associating Body Models
A World Item only becomes meaningful when body models are associated with it. Association is done by placing body items as child items of the World Item.
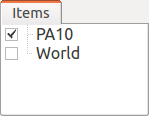
Let’s try this with the PA10 model we’ve been working with. With the PA10 model loaded and the World Item created as described above, you should see two items displayed side by side in the Item Tree View as follows:
Here, following the instructions in Item Tree Management - Movement, drag “PA10” onto “World” to move PA10 as a child item of World, resulting in:
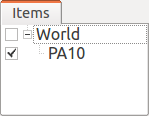
This associates the PA10 model with the virtual world “World”.
Note
If you generate a World Item while “PA10” is selected, the generated World Item will be placed as a child item of PA10, reversing the parent-child relationship from the example above. In this case, first drag the World Item to an empty area at the bottom of the Item Tree View. This will remove the World Item from being a child of PA10, and then you can perform the operation described above.
Note
If you create a World Item and load a body model with it selected, the model will be loaded as a child item of the World Item from the beginning. When creating a project with a World Item from scratch, you can streamline operations by doing this.
Associating Multiple Body Models
Typically, multiple body models are associated with one virtual world. In this case, simply have multiple body items as child items of the same World Item.
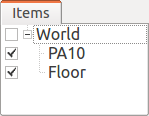
Let’s add a floor model from Sample Models in addition to the PA10 model we just worked with. Load “misc/floor.wrl” from the share directory and associate it with the same World Item. The item tree should look like this:
Check the Floor item as well to display the floor model in the Scene View. With PA10 in the standard pose, you should see a scene like the following:
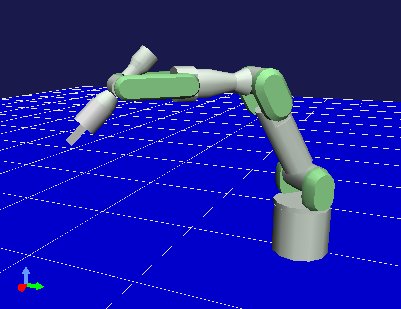
In the following sections, we’ll detect and display collisions between this PA10 and the floor model as an example of collision detection.
Collision Detection Settings
Whether to perform collision detection can be toggled in the properties of World Items and Body Items. The related properties are as follows:
Item |
Property (true, false) |
Description |
|---|---|---|
World Item |
Collision detection |
Whether to perform collision detection for the entire virtual world |
Body Item |
Collision detection |
Whether to perform collision detection with other body models for each body model |
Body Item |
Self-collision detection |
Whether to detect self-collisions in each body model |
First, as a fundamental setting for collision detection, the World Item’s “Collision detection” must be set to true. Then, configure the two Body Item properties to individually toggle whether to perform collision detection for each model.
The World Item’s “Collision detection” is false by default, so first switch this to true (see Item Properties). For Body Items, the “Collision detection” property is true by default, which can remain as is. “Self-collision detection” will be explained later.
Note
Collision detection is generally a computationally intensive process. This impact becomes greater especially when models are complex (many polygons, etc.), and in some cases, model manipulation and display may become sluggish. Considering this, it may be more comfortable to skip collision detection processing when performing work that doesn’t particularly require it. This is why the World Item’s “Collision detection” is false by default.
The above settings enable internal collision detection calculations. However, additional settings are required to display the detection results. Since there are various ways to display collisions and you may not always want to display them, this approach is taken.
Displaying Collision Detection Results
Here, we’ll introduce how to display collision detection results in the Scene View. To do this, first check the World Item in the Item Tree View.

This means displaying the virtual world information held by the World Item in the Scene View, similar to how checking a Body Item displays that model in the Scene View.
Additionally, as a Scene View setting, turn on the “Toggle the collision line visibility” button in Scene Bar (the part enclosed in the red frame in the figure below).

This will display “collision lines” at corresponding locations in the Scene View when collisions occur.
The settings related to collision detection and display are now complete. When collision calculations and their display are no longer needed, simply turn off the corresponding settings mentioned above.
Collision Detection Example
Let’s perform collision detection between PA10 and the floor. Using Changing Posture Using Inverse Kinematics, try moving the arm’s end toward the floor. When you move it to a position where the arm penetrates the floor, several green lines will be displayed at the colliding parts as shown below. These are the collision lines.
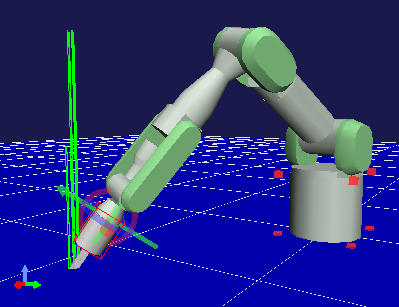
Here, the direction of the collision lines represents the normal of the colliding surfaces, and the length represents the depth of the collision. This way, you can confirm the collision detection results.
Penetration Block Function
When collision is detected while moving a link, you can block it from penetrating further. To do this, turn on the “Penetration block mode” button in the Kinematics Bar (the part shown in the red frame below).

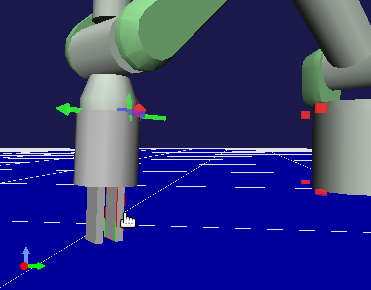
In this state, try moving the arm toward the floor as before. When the link you’re dragging contacts the floor, it can no longer move in that direction. For example, when moving the “J7” link, it will be blocked in the state shown below:

However, as you can see in this figure, only the link being moved by the user is blocked. Even if collisions occur with other links, they are not blocked, so you need to be aware of this. In this example, if you want to block at the gripper part at the end, switch the kinematics mode to inverse kinematics mode and move the end links (“HAND_L” or “HAND_R”). Then blocking will occur at the position shown below:
Self-Collision Detection
In the above example, we performed collision detection between different body models, but you can also detect self-collisions that occur within a single body model. This function is off by default, but can be enabled by setting the Body Item’s “Self-collision detection” property to true.
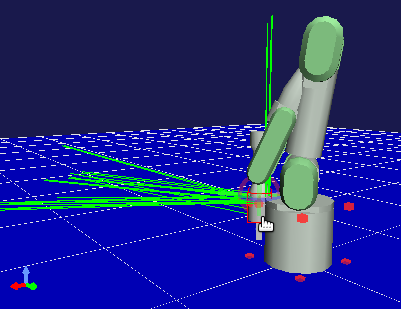
In the PA10 example, you can see that self-collision is detected when you make the arm’s end collide with the base part, as shown below:
Note that the penetration block function does not work for self-collisions.
Collision Display in Body/Link View
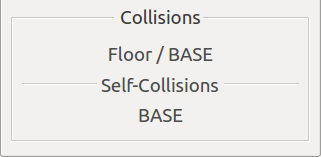
Collision detection results can also be confirmed in the “Collisions” display area of Body/Link View. Here, when the target link has collisions, it displays the names of the colliding links. Links from other models are displayed in the “Collisions” area, and self-colliding links are displayed in the “Self-Collisions” area.
For example, when selecting the J7 link as the target in the PA10 model, and the J7 link is colliding with the floor model and its own “Base” link, the display appears as follows:
Switching Collision Detectors
Various algorithms have been developed for collision detection. To meet demands such as using different algorithms for different purposes or using faster algorithms, Choreonoid allows you to add new “Collision Detectors” that implement collision detection algorithms through plugins and switch between them.
Switching collision detectors is done by setting the World Item’s “Collision detector” property. This property is a selection type that displays a list of available collision detectors, from which you can select the desired one. The standard collision detector provided by Choreonoid is “AISTCollisionDetector”, which is selected by default. “NullCollisionDetector” in the options represents an empty collision detector, and selecting this prevents collision detection from being performed.
By introducing plugins, collision detectors other than these can also be used. For example, the “ODE Plugin”, one of Choreonoid’s optional plugins, provides a collision detector called “ODECollisionDetector” that uses the collision detection function of the Open Dynamics Engine (ODE), which becomes selectable when the plugin is installed.
About Collision Detection in Simulation
The collision detection function introduced in this section is basically performed independently of Simulation Function. In the current specification, whether the “Collision detection” property of World Items or Body Items is true or false does not change the simulation behavior. Collision detection in simulation is performed on the physics calculation model inside the simulator, and its processing content is determined by Simulator Item.
If the collision detection function in this section is enabled, collision detection will be performed again for the model positions and orientations updated by simulation result playback. Note that this may differ from the collision detection results performed inside the simulator.