Building the PhysX Plugin
Installing PhysX
To use the PhysX plugin, you need to install the PhysX library. Currently, operation has been confirmed with version 3.4.
First, obtain the source code. The PhysX source code is managed on GitHub, but to access it, you need to follow the procedure described on the PhysX Source on GitHub page. The steps are:
Create an account on developer.nvidia.com.
Log in with that account and register your GitHub account.
You will receive an invitation email from GitHub, so follow the instructions in the email.
Links for account creation and other steps are available on the above page, so please follow those instructions.
Once you can access the NVIDIAGameWorks/PhysX-3.4 source, execute git clone to obtain it.
For Ubuntu
Navigate to PhysX-3.4/PhysX_3.4/Source/compiler/linux64 in the directory where you saved PhysX, and execute:
make release
This will create the library.
For Windows
Open the solution file PhysX.sln in PhysX-3.4/PhysX_3.4/Source/compiler/vc14win64 in the directory where you saved PhysX.
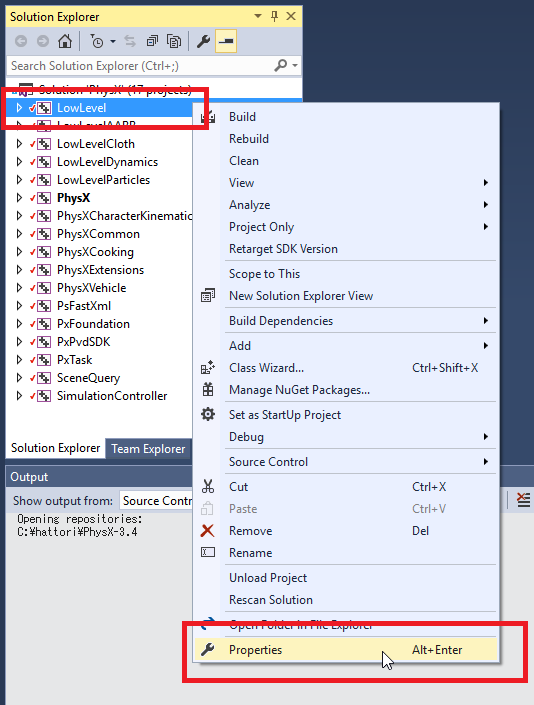
Right-click on the LowLevel project as shown in the figure to display the menu, and select Properties.
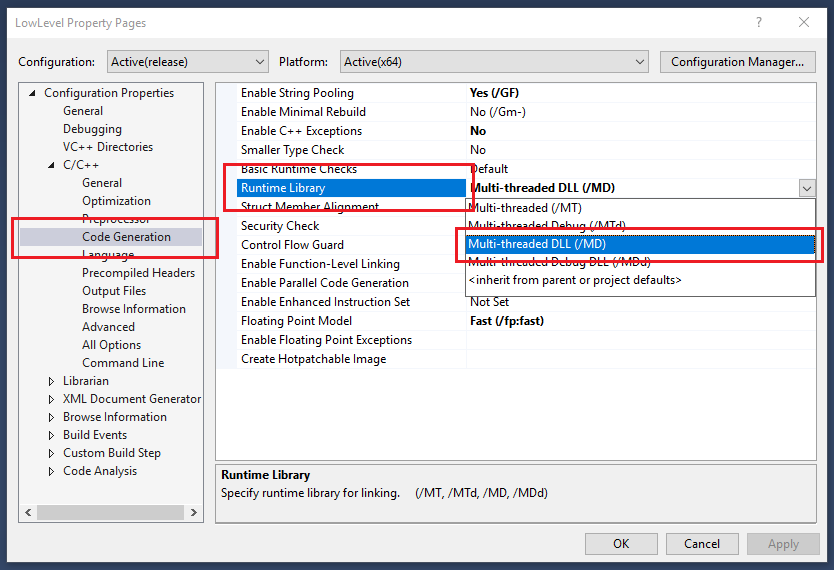
When the Properties dialog opens, change Code Generation - Runtime Library to Multi-threaded DLL (/MD).
Make the same change for all projects.
Then build the solution.
Building the Plugin
When building Choreonoid, set the BUILD_PhysX_PLUGIN item to “ON” in the CMake configuration, and specify PhysX-3.4/PhysX_3.4 in the directory where you saved PhysX for PhysX_DIR.
Running Simulations
Simulations using the PhysX plugin follow the same method as using other physics simulators. You can run simulations by creating a simulator item “PhysXSimulator” and placing it as a child item of a world item.