How to use BodySyncCamera
BodySyncCamera is a camera that moves in accordance with the movement of body models such as robots. When a body model moves during simulation or other operations, selecting this camera for scene view rendering causes the camera to move along with the body’s movement, providing a tracking view of the robot. This section explains how to use this camera.
Creating a BodySyncCamera item
From the menu, select File - New - BodySyncCamera to create a BodySyncCamera item, and place it as a child item of the body item you want to synchronize with. Give the item a name to distinguish it from other cameras. Also, make sure to check the item.
The following shows the state of the item tree view when introducing a BodySyncCamera to the “SR1Walk.cnoid” sample.
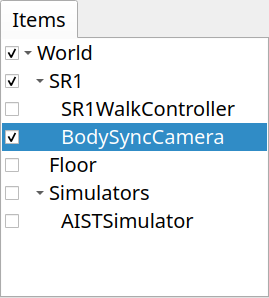
Since we are trying to synchronize with the SR1 robot’s movement here, we have introduced the camera item as a child item of the SR1 item. Please note that if it is not a child item of the target body item, it will not synchronize with the body’s movement.
Selecting the BodySyncCamera
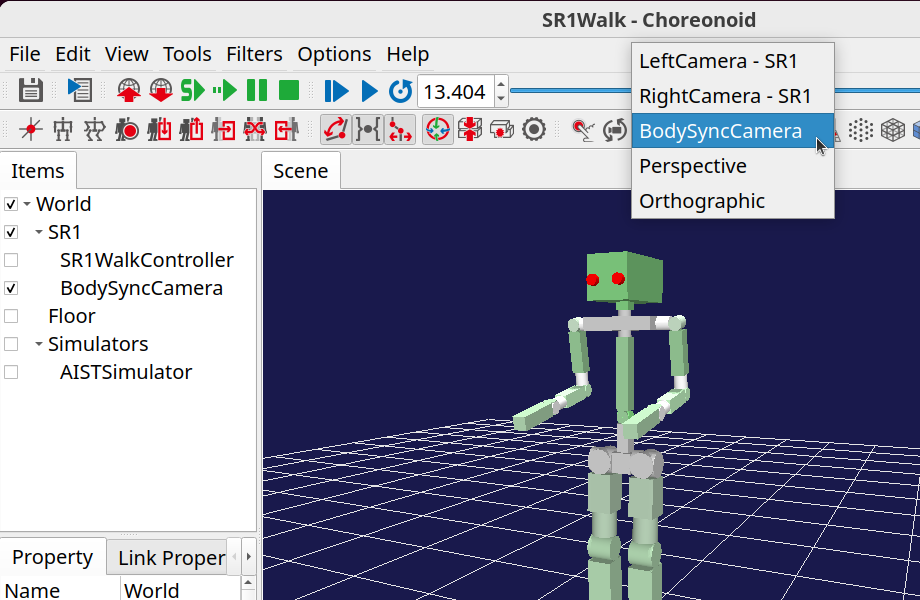
When you check the BodySyncCamera item, the camera corresponding to the item will be displayed in the “Drawing camera selection combo” in the scene bar, so select it. For information on selecting cameras in the scene view, see Changing Rendering Camera.
The following is an example of camera selection in the SR1Walk project.
In this state, you can also change the viewpoint using mouse operations, so adjust it to a viewpoint that is easy to see.
Camera synchronization
When the target body moves, the camera also moves in conjunction with it. More precisely, the relative positional relationship between the body’s root link and the camera is maintained.
For example, in the SR1Walk project, when you start the simulation and the SR1 robot walks, the camera will follow its movement.
Since the camera synchronizes when the position of the target body model changes, it will synchronize not only during simulation but also when the body position changes through operations such as the time bar or placement view.
Camera configuration
Selecting “Camera configuration” from the context menu displays the camera configuration dialog shown below.
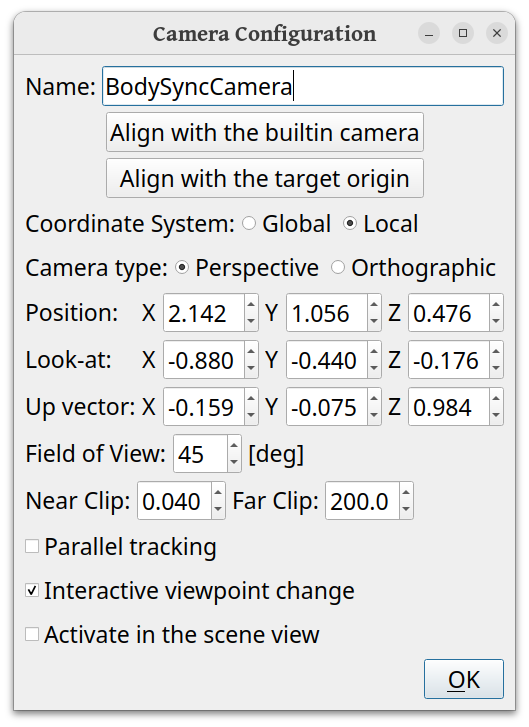
The configurable items are as follows.
Setting Item |
Meaning |
|---|---|
Name |
The name of the item. Also used as the camera name. |
Align with the builtin camera |
Pressing this button sets the camera configuration to match the built-in camera. |
Align with the target origin |
Sets the camera position to the origin position of the target (target body/link). |
Coordinate System |
Selects whether the coordinate system for the camera position and orientation set in this dialog should be global or local coordinates from the target. |
Camera type |
Selects the camera projection type. |
Position |
Sets the camera position. |
Look-at |
Sets the camera’s line of sight direction. |
Up vector |
Sets the camera’s upward direction. |
Field of View |
Sets the camera’s field of view. |
Near Clip |
Sets the near clipping distance. |
Far Clip |
Sets the far clipping distance. |
Parallel tracking |
When checked, only the camera position is synchronized with the target without changing the camera orientation (direction). |
Interactive viewpoint change |
When checked, you can interactively change the camera position and orientation through mouse viewpoint change operations. |
Activate in the scene view |
When checked, this becomes the camera used in the scene view. |
Properties
The BodySyncCamera can also be configured with the following properties.
Camera type
Field of View
Near clip distance
Far clip distance
Interactive viewpoint change
Target link
Parallel tracking
By specifying a link name in “Target link”, you can make links other than the target body’s root link the synchronization target. The other properties are the same as the items in the configuration dialog.