Creating a Movie File from a Sequence of Images
This page explains how to turn screen operations in Choreonoid into a movie file. Choreonoid cannot generate a movie file directly from screen operations, but a sequence of images that Choreonoid outputs can be converted into a movie file by using a video encoder that supports image sequences. The following describes how to perform the conversion using FFmpeg on Ubuntu and TMPGEnc on Windows. FFmpeg and TMPGEnc are used here only as examples; you may use any other conversion software. Note that TMPGEnc is commercial software, so a purchase is required to use it.
Showing the Movie Recorder Bar
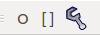
When you select “View” - “Show Toolbar” - “MovieRecorderBar” from the Choreonoid menu, the movie recorder bar shown in the figure below appears.
Recording with the Movie Recorder
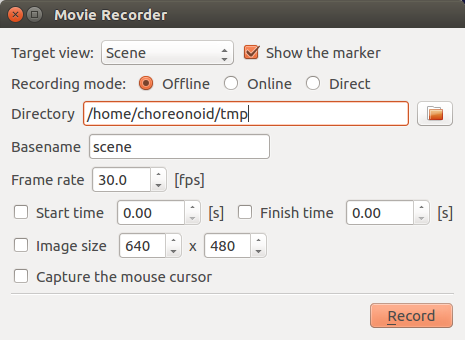
When you click the wrench icon on the movie recorder bar, the “Movie Recorder” window appears.
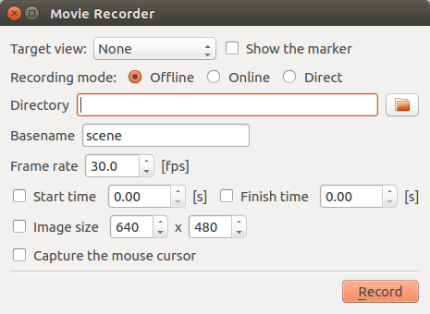
By configuring the items listed below, you can record in a variety of ways.
Item |
Description |
|---|---|
Target view |
Selects the view to record. |
Show marker |
Displays a marker on the selected view. |
Recording mode |
Offline: When you press the “Record” button after a simulation has finished, the simulation result is recorded.
Online: When you press the “Record” button, the recorder enters a standby state. Recording starts when the simulation begins and ends when the simulation stops.
Direct: When you press the “Record” button, recording starts immediately, and pressing it again stops the recording. Recording takes place even when no simulation is running.
|
Directory |
Specifies the directory where the image sequence is output. |
Base file name |
Specifies the base file name. The actual output file name is “base file name” + “8-digit sequence number” + “.png”. |
Frame rate |
Sets the number of frames per second. The default is 30 fps. |
Start/end time |
Recording starts at the specified start time and ends at the specified end time. |
Image size |
Sets the image size. The default is 640 x 480. |
Capture the mouse cursor |
The mouse cursor is also captured. |
How to Record a View
Launch Choreonoid and load the target project. Here, we load SR1LiftUp.cnoid.
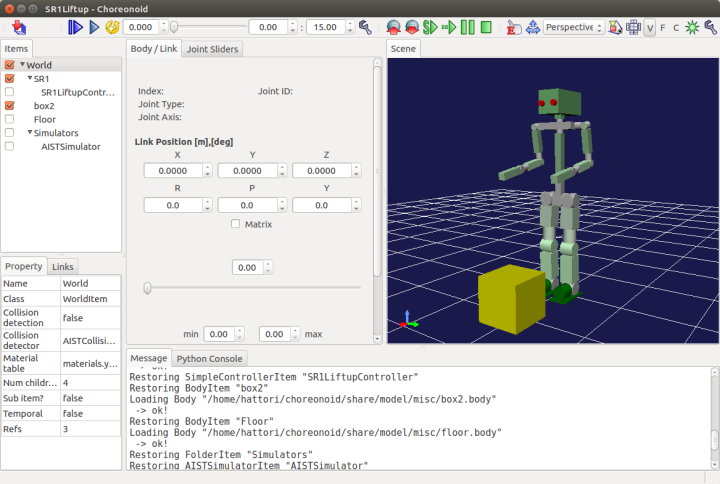
From the Choreonoid menu, select “View” - “Show Toolbar” - “MovieRecorderBar” to display the movie recorder bar. Then click the wrench icon on the movie recorder bar to open the “Movie Recorder” window. Since the recording target here is the scene view, set the target view to “Scene”, the recording mode to “Offline”, and the directory to any directory of your choice; leave the other items at their default settings.
Run the simulation once so that the animation is ready to be played back. Then press the “Record” button in the “Movie Recorder” window.
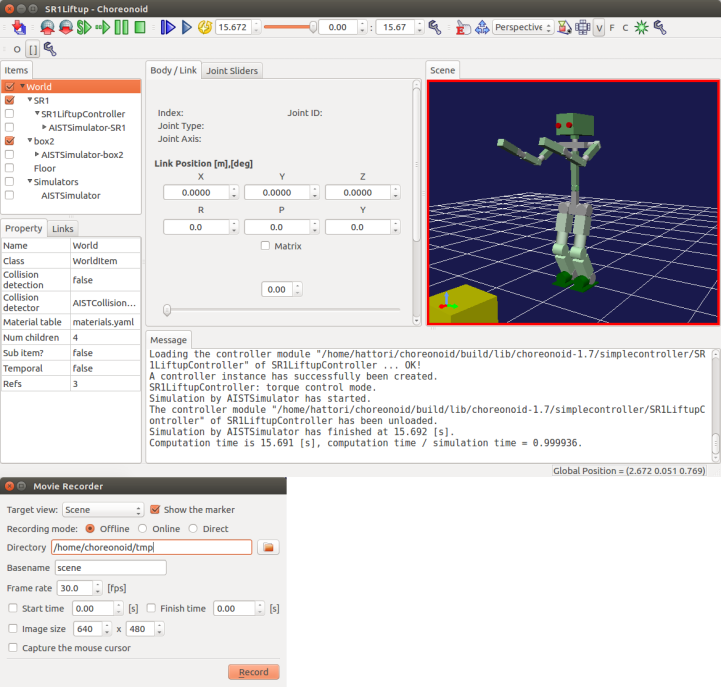
When a message indicating that recording has finished is displayed in the “Message” view, the output of the image sequence is complete.

Installing FFmpeg (Ubuntu Linux)
Run the following command to install FFmpeg.
sudo apt-get install ffmpeg
Converting an Image Sequence to a Movie (Ubuntu Linux)
Move to the directory that contains the image sequence and run the following command.
ffmpeg -r 30 -i scene%08d.png -r 30 movie.mp4
“-r <framerate>” converts the frame rate to the specified value. If not specified, the value of the input file is inherited.
“-i <filename>” specifies the input file path.
Installing TMPGEnc (Windows)
Open a web browser such as Internet Explorer and access the following URL.
http://www.pegasys-inc.com/en/
Select “Home” - “Products” - “Download”, and click the “Download” button for “TMPGEnc Video Mastering Works 6”. Click “Download” for the “Retail Version” and press the “Agree” button to start the download. Once the download is complete, run the .exe file to install it.
Converting an Image Sequence to a Movie (Windows)
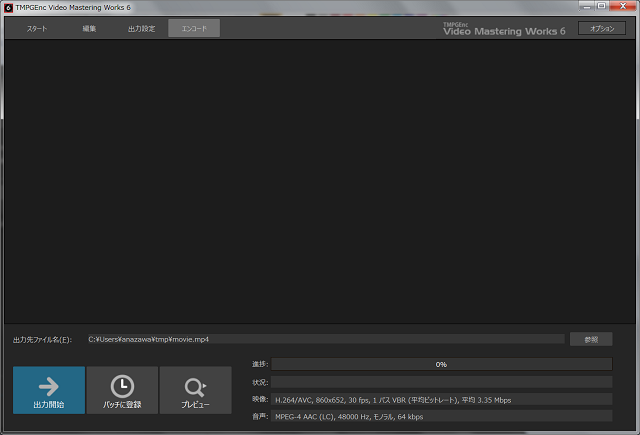
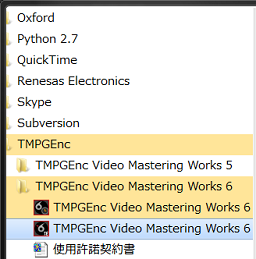
From the Start menu, click “TMPGEnc” - “TMPGEnc Video Mastering Works 6”.
When TMPGEnc Video Mastering Works 6 starts, click “Preferences”.
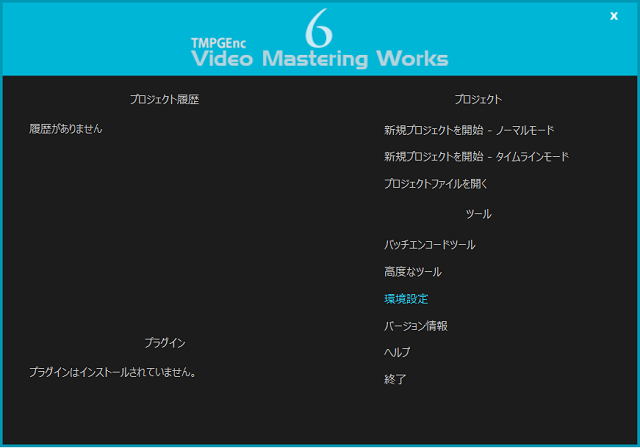
Set any folder path under “Folder Settings” - “Output File” and press the “OK” button.

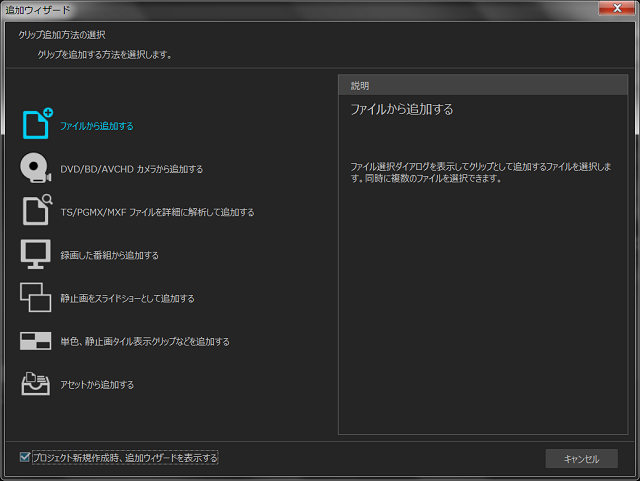
Next, click “Start a New Project - Normal Mode”. When the “Add Wizard” window appears, select “Add from a file”.
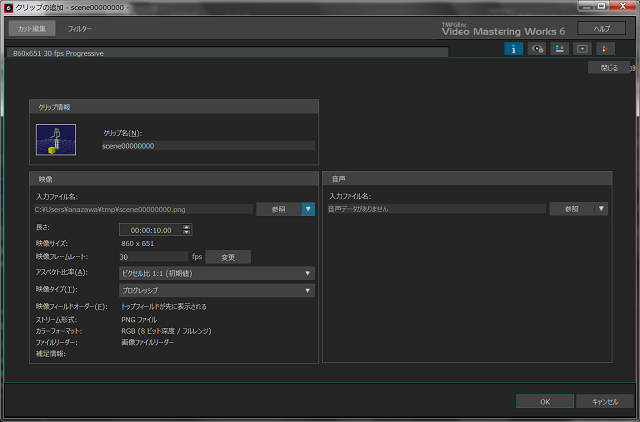
From the folder containing the image sequence, select the image with the smallest sequence number. When the “Add Clip” window appears, click the arrow next to the “Browse” button under “Video” - “Input file name”.
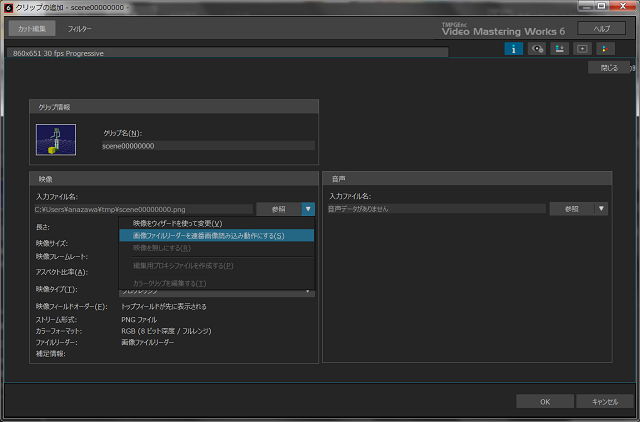
When the list appears, select “Make the image file reader read image sequences” and press the “OK” button.
Change “Encode” - “Output file name” to any name you like, and press the “Start Output” button to complete the movie creation.